November 05, 2018
Chic Macramé Wall Hanging DIY for Beginners

The latest bohemian decor trend has brought with it the return of macramé. Macramé is the art of knotting rope or cord to form patterns and was all the rage in the ’70s. These intricately crafted pieces have made a comeback and can be found everywhere. If you want to embrace this bohemian look without the high cost, try your hand at DIY macramé.
Macramé can seem like a daunting craft at first, so we’ve created a macramé wall hanging DIY for beginners. The macramé tutorial only uses four types of common macramé knots and we give step-by-step instructions on how to create each one. We’ve also included style inspiration to show you how to display this unique macramé wall hanging.
Let’s get started!
Knots you’ll need:
Lark’s head knot
Square knot
Double square knot
Double half hitch knot
How to Tie a Lark’s Head Knot
Step 1: Fold the cord in half.
Step 2: Push the folded side of the loop away from you and over the edge of the object (ring or dowel).
Step 3: String the ends of the cord through the loop and pull tight.
Used in: macrame tutorial
How to Tie a Square Knot
Step 1: Place four cords in front of you.
Step 2: Cross the rightmost cord over the two middle cords so that it forms a “D” shape.
Step 3: Pull the leftmost cord toward you and then guide it under the end of the rightmost cord, behind the two middle cords, and through the middle of the “D” shape.
Step 4: Tighten the cords.
Step 5: Repeat, this time starting with the leftmost cord. Guide the rightmost cord behind the middle two cords and through the “D” shape.
Step 6: Tighten the knot.
Used in: macrame tutorial
How to Tie a Double Square Knot
This knot is the same as the square knot, it just has twice as many cords.
Step 1: Place eight cords in front of you.
Step 2: Cross the two rightmost cords over the four middle cords so that it forms a “D” shape.
Step 3: Lightly pull the two leftmost cords toward you and then guide them under the end of the two rightmost cords, behind the back of the middle four cords, and through the point that the two rightmost cords made.
Step 4: Tighten the cords.
Step 5: Repeat, this time starting with the two leftmost cords. Guide the two rightmost cords behind the middle four cords and through the backwards “D” shape.
Step 6: Tighten the knot.
Used in: macrame tutorial
How to Tie a Double Half Hitch Knot
In this macramé tutorial, we’ll be tying this knot around a hoop and at a diagonal.
Step 1: Start with your cord hanging behind the hoop.
Step 2: Take the end of the the cord, pull it toward you, then loop it over the hoop and pull to the left.
Step 3: Repeat this step once more, pulling the end of the cord up though the loop you’ve created.
Step 4: Tighten.
Used in: macrame tutorial
Macramé Wall Hanging Tutorial
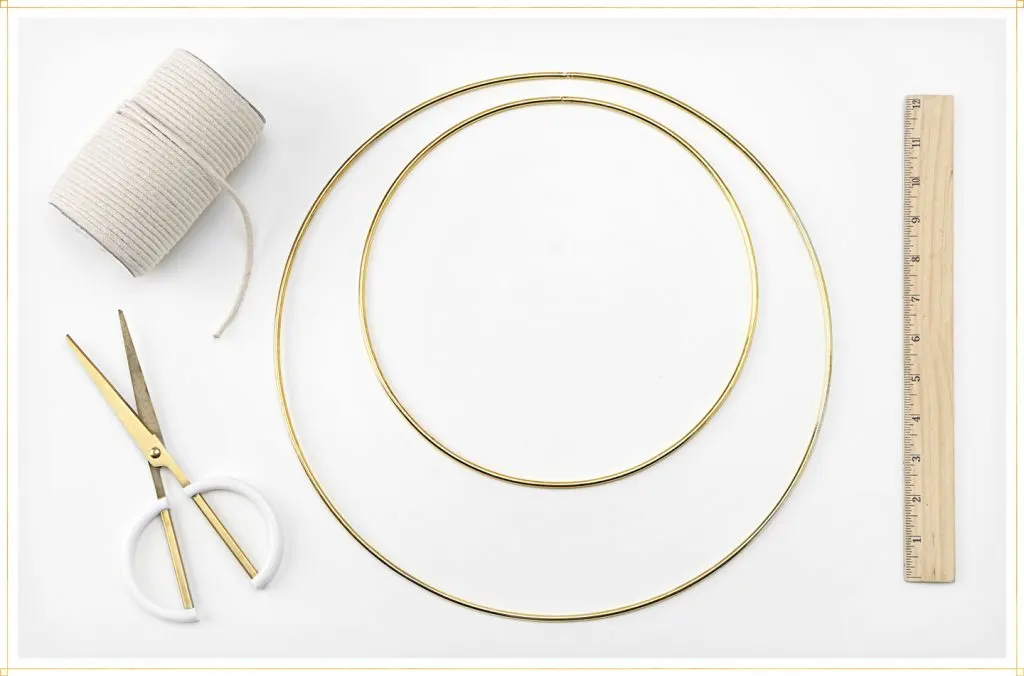
What you’ll need:
160 feet of macramé cord (3mm thick)
Scissors
10-inch gold hoop
14-inch gold hoop
Tape measure
Step 1: Cut the macramé cord into sixteen 10-foot pieces.
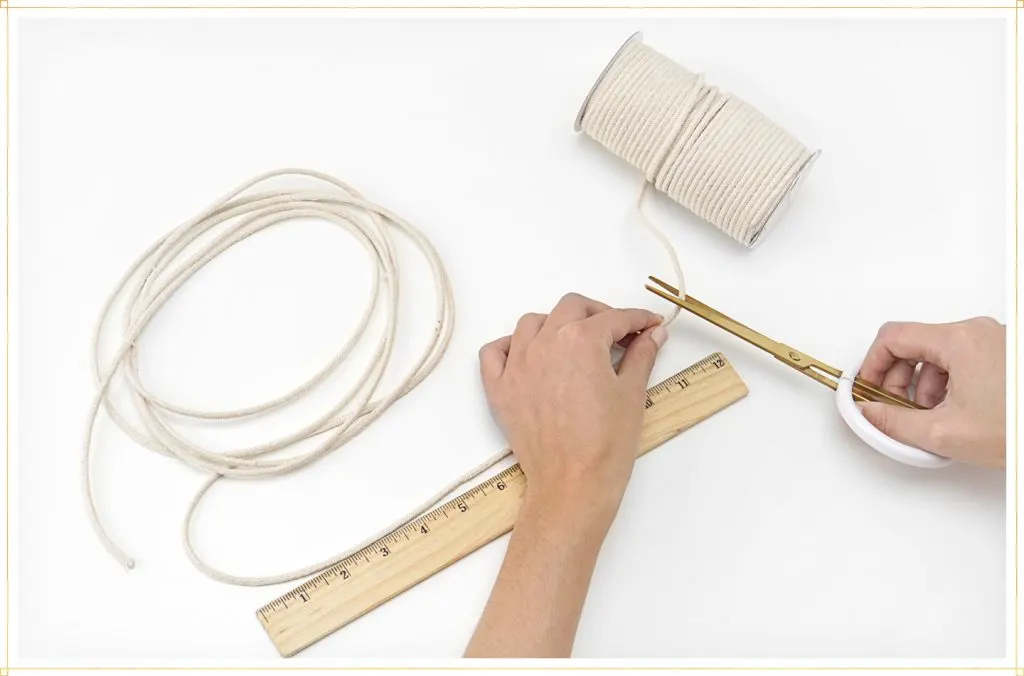
Use the tape measure to measure out 10 ft of cord. Once you cut one piece, you can use that to measure out the rest.
Step 2: Tie 16 lark’s head knots onto the 10-inch hoop.
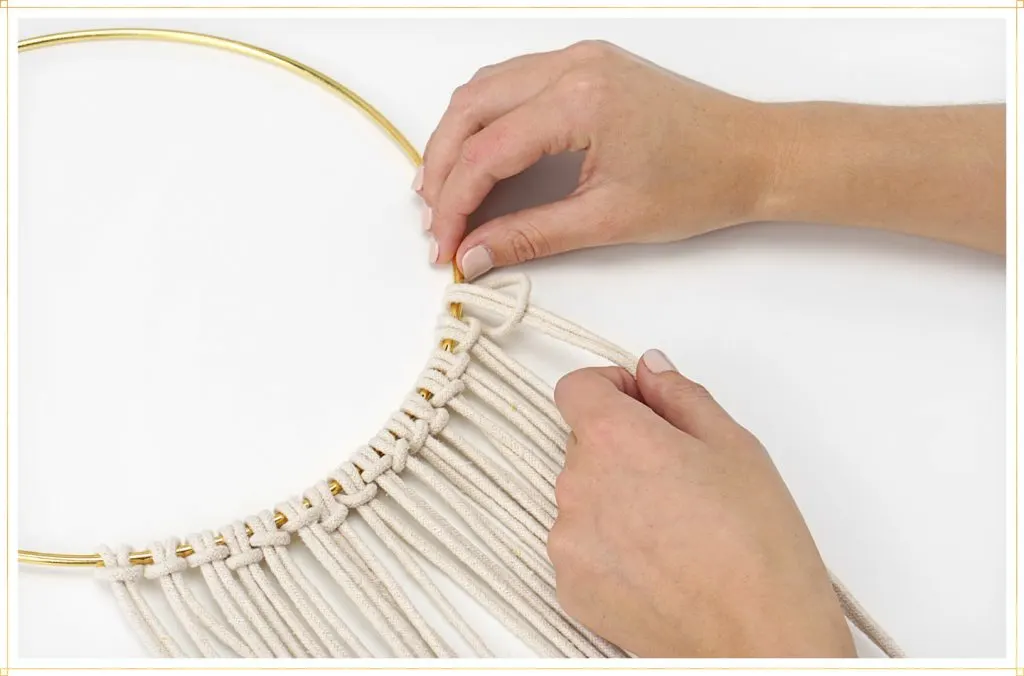
Fold a piece of cord in half and tie a lark’s head knot around the 10-inch hoop. Repeat this for all 16 pieces of macramé cord.
Step 3: Create 7 rows of square knots, alternating between tieing 7 and 8 knots.
When following this tutorial, the 1st cord is the leftmost cord.
Row 1: Start with 1st cord — tie 8 square knots
Row 2: Start with 3rd cord — tie 7 square knots
Row 3: Start with 1st cord — tie 8 square knots
Row 4: Start with 3rd cord — tie 7 square knots
Row 5: Start with 1st cord — tie 8 square knots
Row 6: Start with 3rd cord — tie 7 square knots
Row 7: Start with 1st cord — tie 8 square knots
Step 4: Attach each of the 32 cords to the bottom of the 14-inch hoop with a double half hitch knot.
Row 8: Start with 1st cord — tie 32 double half hitch knots to the hoop.
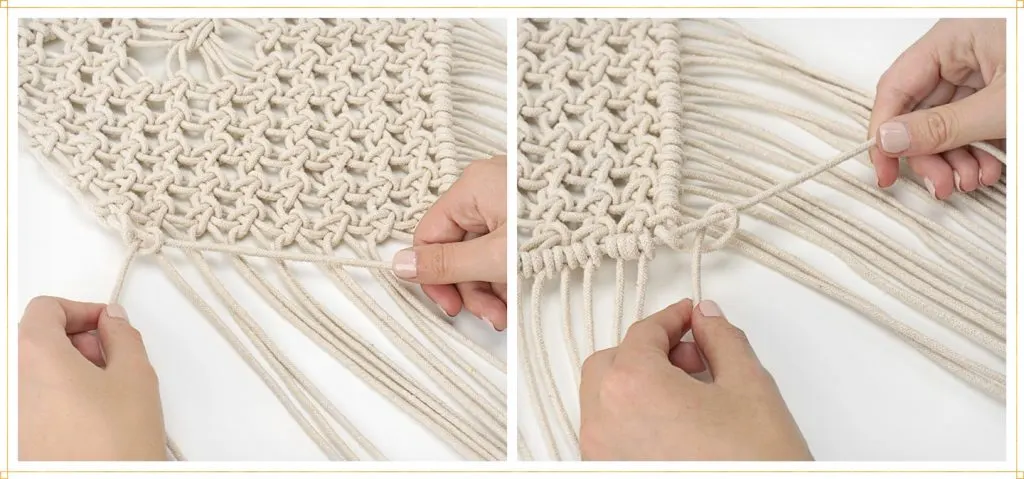
Step 5: Continue tying square knots and double square knots for 16 more rows.
Row 9: Start with 1st cord — tie 8 square knots
Row 10: Start with 3rd cord — tie 3 square knots, skip 4 cords, tie 3 square knots
Row 11: Start with 1st cord — tie 3 square knots, skip 8 cords, tie 3 square knots
Row 12: Start with 3rd cord — tie 2 square knots, skip 2 cords, tie 1 double square knot, skip 2 cords, tie 2 square knots
Row 13: Start with 1st cord — tie 3 square knots, skip 8 cords, tie 3 square knots
Row 14: Start with 3rd cord — tie 3 square knots, skip 4 cords, tie 3 square knots
Row 15: Start with 1st cord — tie 8 square knots
Row 16: Start with 3rd cord — tie 7 square knots
Row 17: Start with 1st cord — tie 8 square knots
Row 18: Start with 3rd cord — tie 7 square knots
Row 19: Start with 5th cord — tie 6 square knots
Row 20: Start with 7th cord — tie 5 square knots
Row 21: Start with 9th cord — tie 4 square knots
Row 22: Start with 11th cord — tie 3 square knots
Row 23: Start with 13th cord — tie 2 square knots
Row 24: Start with the 15th cord — tie 1 square knot
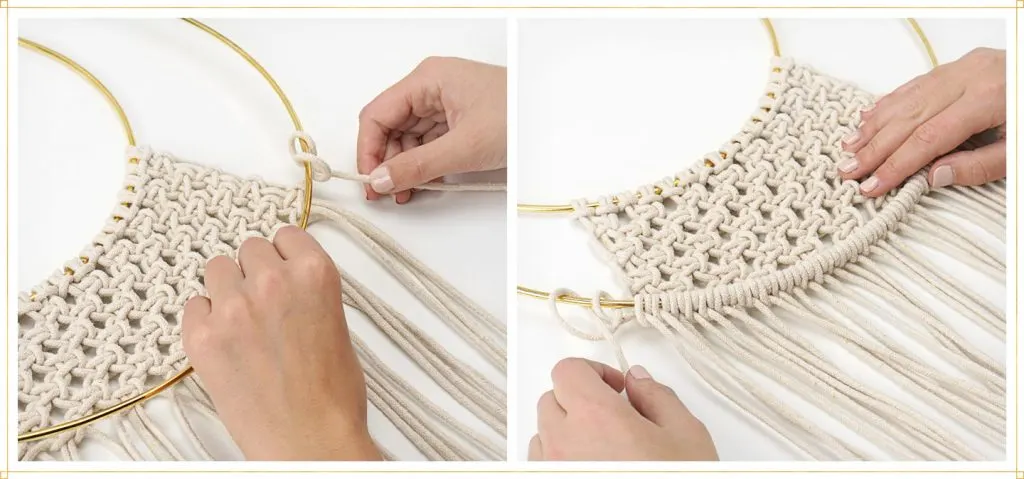
Step 6: Tie 16 diagonal half hitch knots starting with the rightmost cord.

A diagonal half hitch knot is the same as a regular, but instead of tying it around the hoop you’ll be tying it around another string. Take the rightmost cord (32nd) and cross it over the other cords to the left. Start with the 31st cord and tie 15 half hitch knots to the 32nd cord.
Row 25: Start with the 31st cord — tie 15 diagonal half hitch knots to the left.
Step 7: Tie 16 diagonal half hitch knots starting with the leftmost cord.
Repeat the previous step on the opposite side. Cross the leftmost cord over the cords to the right and tie half hitch knots to the cord.
Row 25: Start with the 1st cord — tie 16 diagonal half hitch knots to the right.
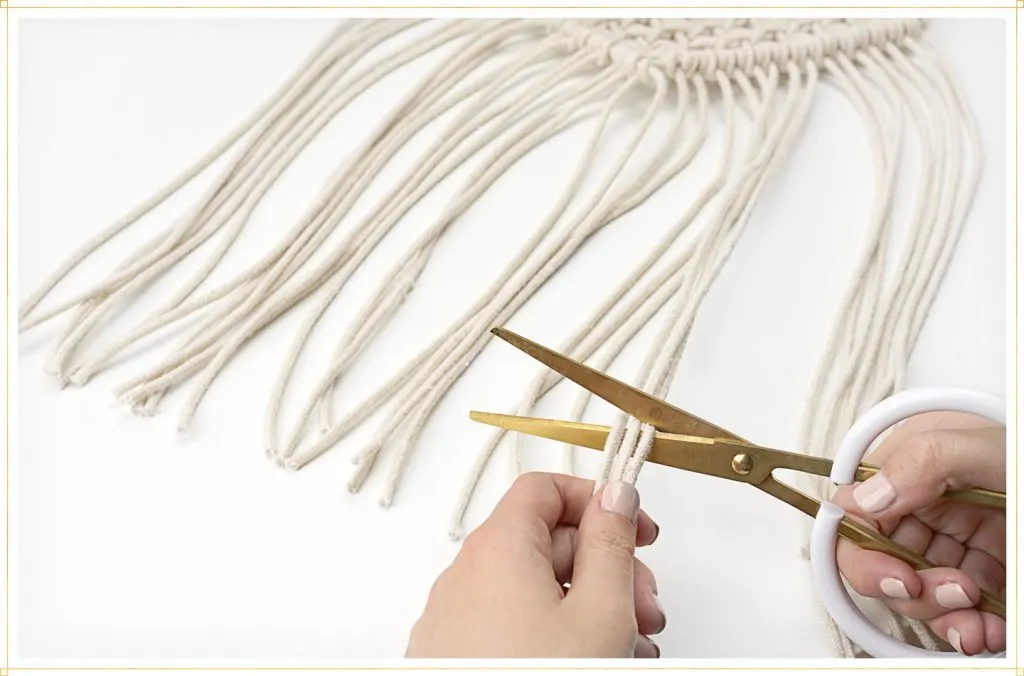
Step 8: Trim the end of the cords.
Step 9: Hang and enjoy!
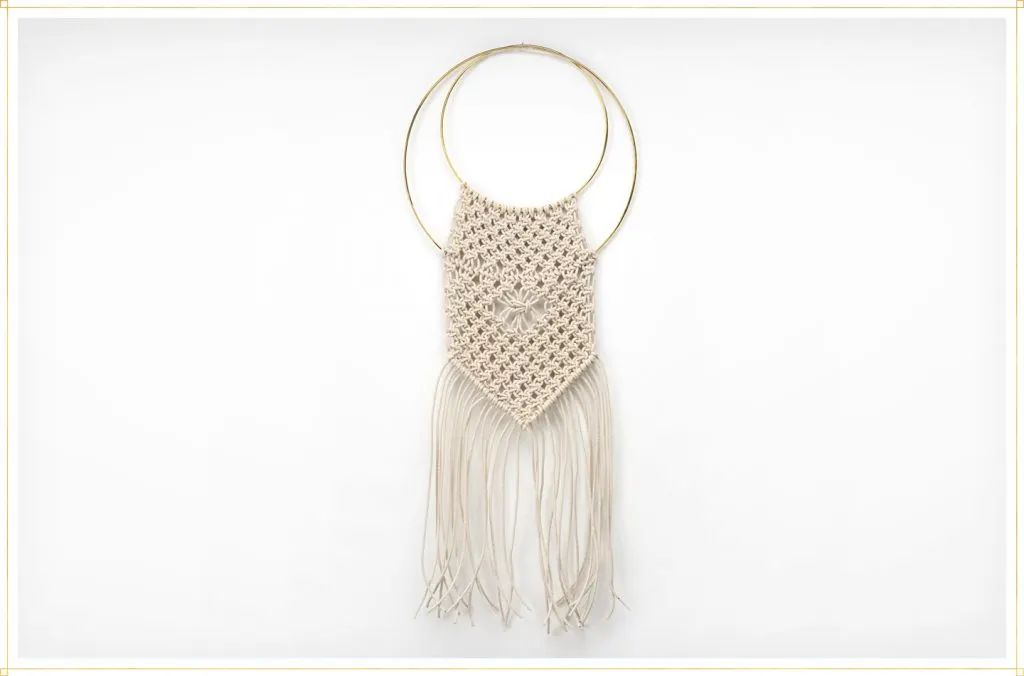
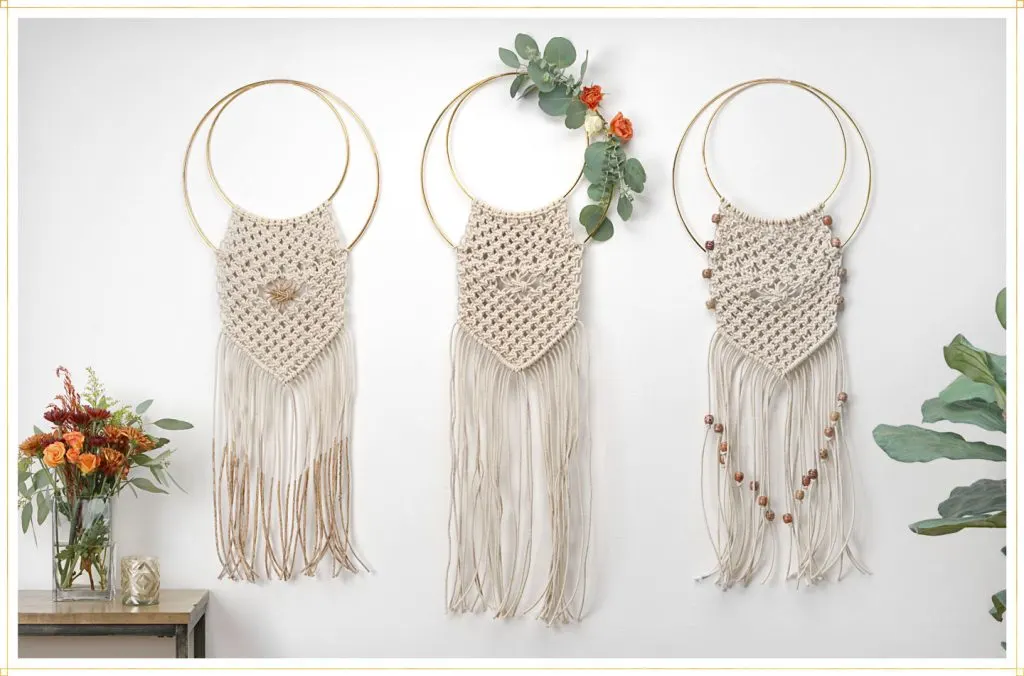
Macrame Wall Hanging DIY Inspiration

Now that you know how easy creating macramé crafts can be, try your hand at a macramé plant hanger to hold your beautiful potted plants.